Thursday, February 28, 2013

Rum & Raisin chocolate balls for Valentine gift

I saw this recipe at TV, 
though I changed a little according to my way.

Good news: It looks like chocolate truffle, but much less calories!
And it's so easy to make, too.


This is what you need:

150g         Any sponge cakes, bought in shop
(in my case, I used mamon cake)
40g           Almond powder
2 TBSP     Rum or non-alcohole Rum syrup
(or orange juice /any kind of juice)
30g           Raisin / Prune / dried fruits
60g           Chopped black or milk chocolate (sweetened)
1/4 TBSP  Vanilla extract
3 TBSP     Cream (around 35% fat contents) 
                 Unsweetened Cocoa powder for coating


So this is the mamon cakes I bought in sale at shopping mall.
It can be bought anywhere here in Metro Manila.

*You can use any soft cake.


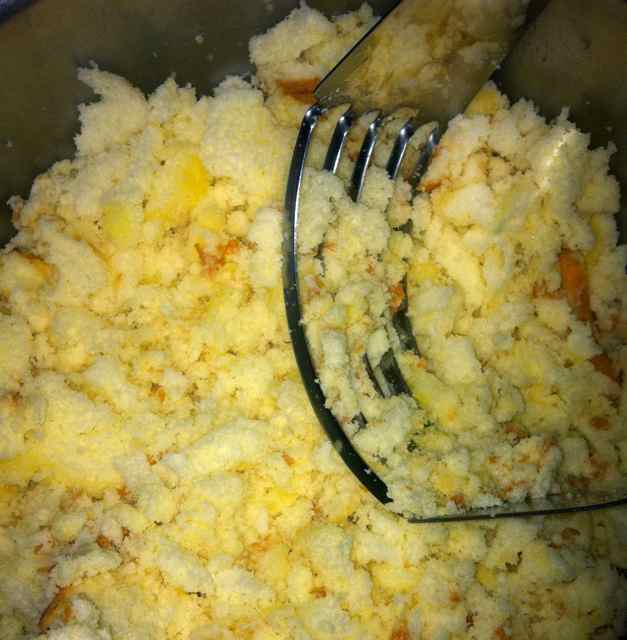
 I used pastry cutter to crush the sponge cake, 
but you can use food processor if you want it easier.


Add almond powder.
(I was making a little more than double size amount)


 Time to add liquar or juice of your choice.


I specially like this brand for cream.


Add Rum or juice (or anything), Raisin, Chopped black or milk chocolate (sweetened), Vanilla extract (preferably organic),  cream  and mix well until blended.


I like to mix until well blended, but you can also intentionally leave the unblended part to enjoy the sponge taste.


If it is hard to make it to a ball,
(because it breaks so easily)
You can use cling wrapper to make it to a ball and chill until firm.


Coat them with powder cocoa.


Done!


Ready to wrap and put ribbons.


  If you want it sweeter,  you can add sugar. 

I didn't know that Valentine's day was the death anniversary of Fr. Valentine who performed wedding ceremony to a soldier who wasn't supposed to get married that time. And because of that, Fr. Valentine got death penalty.  It takes courage to do something right, and I'm sure people always remembered him as the person who supported love.


Friday, February 1, 2013

Cassava cake (Filipino sweets using yuca roots)


I love cassava cake ever since I tasted one here in the Philippines.
Whenever I go to a wet market, 
or place I can buy Filipino sweets, 
I look for cassava cake.
Though I love eating cassava simply boiled 
with Japanese soy sauce + wasabi, 
nobody eats that way except me.


And I was given a lot of cassava 
from my brother in law's farm.
So I searched the recipes in internet, 
to try baking one myself.


So this is cassava.
Sometimes I hear the local news of someone 
who got poisoned by cassava.
It has cyanide 
that if you don't cook well, one can even die.
(And the group of people getting acute cyanide intoxication can happen here in the Philippines.)


Anyway, this is the recipe 
I tried for the second time.
The first try, I didn't write down what I used, 
and just poured things without measuring them.
So next day, I baked again, 
and although I changed a lot from my first try, 
at least I wrote them down.

<What you need>

- For Cassava cake -

1450g cassava root, grated
250g matured cheddar cheese (grated)
227g medium cheddar cheese (grated)
400ml coconut milk
400ml coconut cream
4 eggs (large), organic
250ml evaporated milk
250ml maple syrum, organic
1 tea spoon sea salt
1 table spoon vanilla extract, organic
900ml condensed milk
120g butter melted (French brand: Elle & vire)


- for the topping -

1 table spoon vanilla extract, organic
3 egg yolks, organic
400ml coconut cream
225ml maple syrum, organic
227g cheddar cheese (grated)
225g processed cheddar cheese (mild) grated
300ml condensed milk


<baking time>

Around 60 to 75 minutes total.
45 minutes : cassava base
15 to 30 minutes : topping


So first, peel and grate cassava.


So since I decided not to use sugar, I added maple syrup and eggs first.
You can change this maple syrup to honey,
or use any kind of sugar, too.
For the first try, I used a little of sugar, honey and moscovado sugar  (barbados sugar)
and less condensed milk.


These are the cheese I used this time, 
but I think sharp cheddar was not suitable, 
cause when heated, it can turn hard.
Addition to these cheese, 
I also used ordinary processed cheese 
for the topping.


You just need to mix everything, and that simple.


I added melted butter the last.
(I love this French butter)

*you can start heating up your oven,
180℃ or 375~380℉.


Pour into the baking pans.
It baked better in glass ware than porcelain, to me.

No lining is needed, no oil, or no flour.


But not so deep, cause thicker it is, 
longer the baking time.


The edge gets cooked first..


I set the timer :45 minutes.
But you know it's done when you smell the delicious sweet smell.
(I don't put stick in it in the center, 
but you can also do that.)


While you are waiting for the base to be baked,
prepare the topping.


Just need to mix everything.


When the cassava base is done, 
pour the topping on top.


You can try different kind of cheese 
to make different version.
Some put sweeten coconut or macapuno 
(in Filipino).


It's done as long the topping gets darker 
as you like it.
It took me 30 minutes this time 
because I used maple syrup which was liquid, too.


If you prefer less sweet, 
just get rid of maple syrup,
or use evaporated milk instead of condensed milk.


Some part is not brownish, 
but it has same delicious taste.

Cassava cake doesn't require 
so much specific measurement. 
Actually it's very forgiving 
in any adjustment you want to make.
So try anything if you like.
You can use olive oil instead of butter 
if you like less cholesterol,
(though butter has less calories then oil)
and less cheese, or less sugar.
It will come out okay and suitable to your taste.

Enjoy baking one!